
YOKE DU YOUR

One day, while strolling down the boardwalk, John bumped into an old friend of his, Rob, from high school. “You look great John, how do you stay looking so young? Why you must be 60 already but you don’t look a day over 40!” Rob exclaimed.
“I feel like I’m 40 too!” replied John. “That’s incredible” exclaimed Rob, “Does it run in the family? How old was your dad when he passed?”
“Did I say he was dead?” asked John. “He’s 81 and is more active than ever. He just joined the neighborhood basketball team!” responded John.
“Whoa! Well how old was your Grandfather when he died?”
“Did I say he died” asked John. Rob was amazed. “He just had his 105th birthday and plays golf and goes swimming each day! He’s actually getting married this week!”
“Getting married?!” Rob asked. If he’s 105, why on earth does he want to get married?!
John looked at Rob and replied, “Did I say he wanted to?”
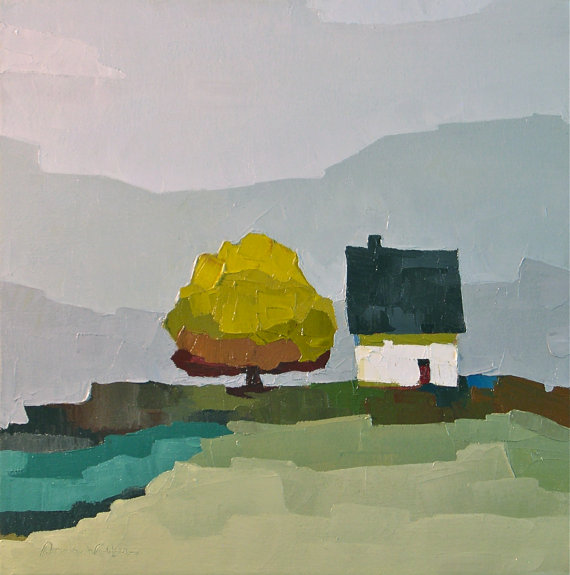
ARTspiration
Artists or art that turns me on and feeds my muse! Like it or dislike it, what about this art inspires your own art or creativity? By artist, Donna Walker.
DESIGNspiration
Look around you. Design is everywhere! How can you incorporate the beauty that surrounds you into your art or craft? Antoni Gaudi.

IDEA I LOVE
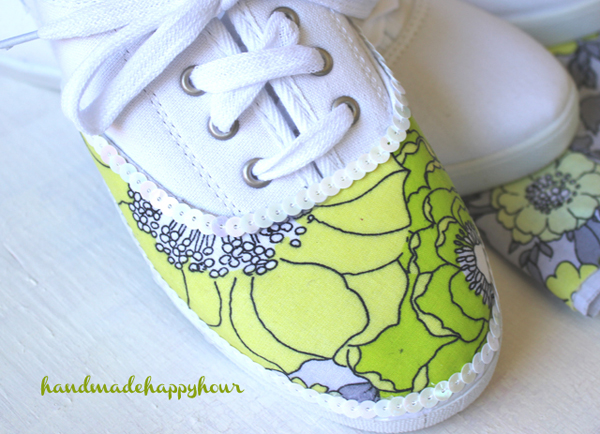
Have some fun with your fabric and notions today when you upcycle a pair of Walmart tennis shoes! Follow the tutorial for cutting your favorite fabric and applying it to your shoes, then dress it up with fun trim (dude, I think I might be forced to use pom-pom trim and forget the little sequins). If you are a sewist who makes her own clothing, you can match your shoes to your shorts (And, of course, everyone will be talking behind your back – so get over it)! I think these are a lot of fun, and would be totally cool for little girls too.
Here’s how you make them:
http://handmadehappyhour.com/2013/06/18/diy-fabric-covered-sneakers-with-mod-podge/
IDEA I LOVE

Organize your change and swim in cuteness with this DIY felt piggy bank. So here’s the deal: once you get those coins inside this oinker, I’m not quite sure how you’re supposed to get them out? Oh, who cares… It’s only life, right? This looks like too much fun not to make. You know, this would also be a terrific little way give a gift of folded up bills or gift certificate as a gift. Make one, starting here:
http://www.dreamalittlebigger.com/post/felt-piggy-banks-tutorial.html
IDEA I LOVE
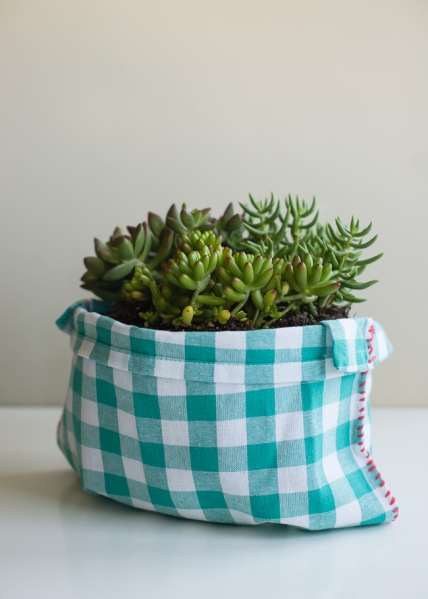
If you’re like the rest of us, then I know you have a few ugly plastic pots sitting around that are displaying your green thumb. Why not take a trip to your local Dollar Store or discount house – or even raid your dining room stash – for some pretty napkins that you can transform into planter pouches. Look, cupcake, it’s not like these are going to end up in the Metropolitan Museum of Modern Art, but they might make your home or yard looked like you weren’t raised in the back room of a Denny’s. Whip some up using these directions:
http://www.henryhappened.com/diy-napkin-basket.html
OMG!!!
Totally weird, man. Found this on HuffPo.
Be Aware! This video may cause temporary hallucinogenic effects. But please do not be afraid, these effects usually last a few seconds. Read aloud every letter in the screen center. Do not make any mistake. In the end “LOOK AWAY NOW” when it says so in red letters.
YUM

BACON WRAPPED CHICKEN BREASTS
INGREDIENTS
- 2 large skinless, boneless chicken breasts (450g each)
- ¼ tsp Himalayan or unrefined sea salt
- 10 slices organic, sugar free bacon
- ½ can (3-4 pieces) artichoke hearts, chopped
- ½ cup sliced water chestnuts, chopped
- 50g sundried tomatoes, finely chopped
- ¼ cup pine nuts
- 1 large clove garlic, minced
- 1 tsp fresh rosemary, finely chopped
- 1 tsp freshly cracked black pepper
- ½ tsp smoked paprika
INSTRUCTIONS
- First, make the stuffing by mixing all the ingredients in a small mixing bowl. Set aside.
- Preheat your oven to 375F.
- Now slice your chicken breasts open. To do that, place the blade of your knife parallel to your cutting board, put your hand flat on top of the breast and carefully slice down the middle almost all the way to the end. You’ll want to stop about ¾ of the way through.
- Lay the chicken breasts open on a cutting board and, with a meat mallet or small saucepan, delicately pound them until they’re about ½ inch thick.
- Place your now flat chicken breasts on your cutting board, sprinkle with salt and deposit half the stuffing in the middle of each breast. Spread the stuffing as evenly as possible but don’t go all the way to the edge; you want to leave about one inch all around.
- Roll the breasts as tightly as you can then carefully wrap each one with the bacon strips. I like to put 4 around and 1 across.
- Place the breasts seam side down in a baking dish, cover loosely with aluminum foil and bake at 375F for 40 minutes.
- Remove foil, drain pan juices (do not discard, this is tasty stuff!) and return to the oven, uncovered, for 15-20 minutes or until bacon is crispy.
- If you want your bacon really crispy, you can set your oven to broil for the final 5LOVEtes or so. Keep a close eye on the prize, though. You wouldn’t want your precious bundles to burn!
- Remove from oven, tent loosely and let the meat rest for 10-15 minutes before slicing.
Read more: http://thehealthyfoodie.com/bacon-wrapped-chicken-breasts/#ixzz37D9y3pbV
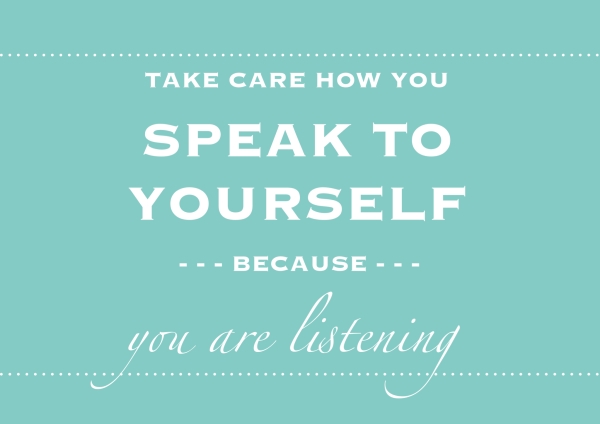
WORDS TO LIVE BY
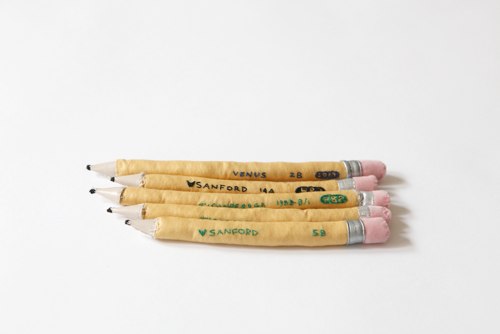
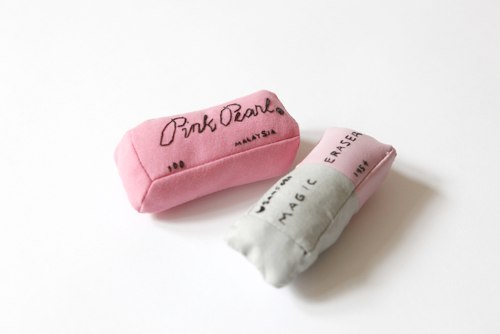
JUST BECAUSE I LIKE IT
Embroidered school supplies by Megan Whitmarsh, available for purchase from Grey Area.
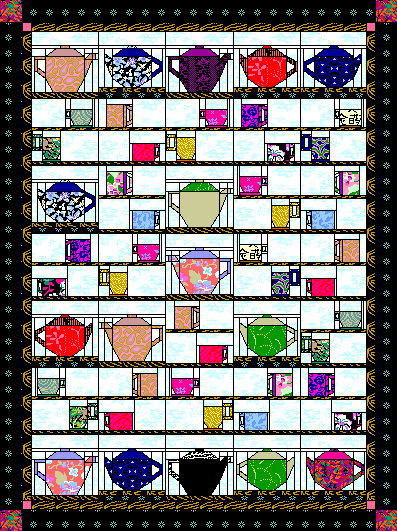
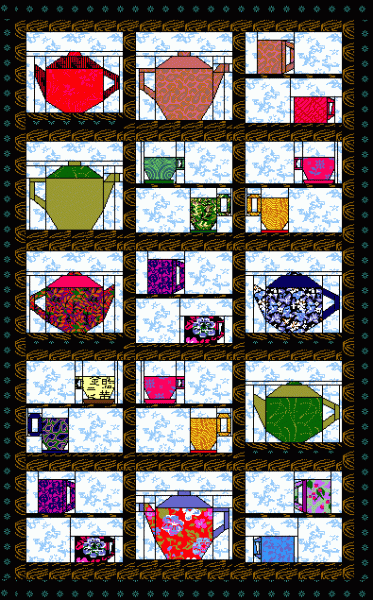
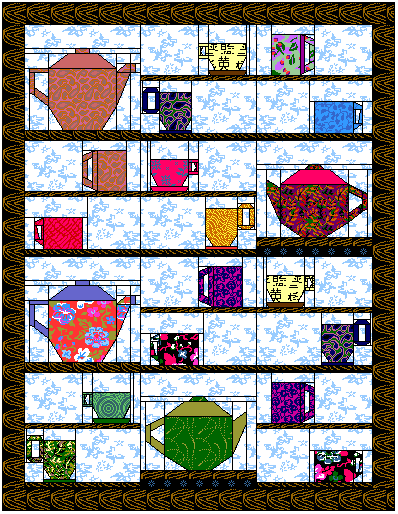
IDEA I LOVE LIKE A LOT
Teapots, Cups, And Coffee Mugs! Here are a bunch of free quilt blocks for you to foundation paper piece along with three different settings scenarios. I LOVE, LOVE, LOVE this design. I just don’t like the quilt. Why?
Because there is no quilt!
RANT UNRELATED TO THIS POST: If you’re going to sell, or tute, or share a pattern for quilting then make the darn quilt! I know, I know, it’s just one of those silly quirks of mine but I like to see a finished quilt from somebody’s design otherwise it’s just some computer-generated BS that a computer-literate 5th grader could design on EQ7. Many will disagree with me, as usual, but I’m too old and too darn cognitively unfiltered to care. I like what I like, and I like a finished quilt with my tutorial or pattern. At this point, I’m even seeing quilt designers posting computer-generated quilt photographs to the covers of their $9-$10 quilt-shop-sold patterns. If you want to be a professional designer worth your salt (and actually start selling your patterns), then start sewing and not just playing on the computer! Quilts can often look good in digital form but suck in quilted form. Or they piece together very well on the computer screen, but actually making them is different and hideous story (ask me how I know about that one). But I digress . . . . now back to the project at hand:
Major props to Susan Druding for the fabulous inspiration, great idea, talent, great design, hard work, three different layouts, (and computer-generated quilt patterns. LOL)
PS I really do LOVE these designs! 😛
http://www.straw.com/equilters/library/PFP/cups-teapot-blocks.html
MEMBA?
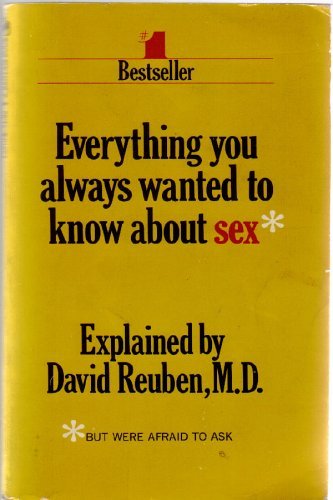
When this book rocked America! 1969 and we’re still asking the same questions?!? (Of course, I secretly bought it with my allowance when I was 13 and visiting my grandmother and I managed to squirrel it away for more than several months, until my puritanical mother (who bragged about her pre-marriage virginity, and wore it like a badge of honor until she died LOL Sheesh!) found it somewhere and all hell broke loose. By then, it was too late. I read it and knew everything I always wanted to know about sex. It wasn’t until my early adult life that, in reflection, the idiot who wrote this book got the ‘homosexual’ chapters completely and factually wrong. Seems as though he didn’t know everything about sex either, and was apparently afraid to ask himself. I often wonder how many young LGBTs swallowed a handful of pills in 1969 thinking what he wrote was true and what he wrote was actually going to be their fate? I remember his writing and descriptions just making me physically ill and wondering if I wouldn’t be better off running away or dead . . . )
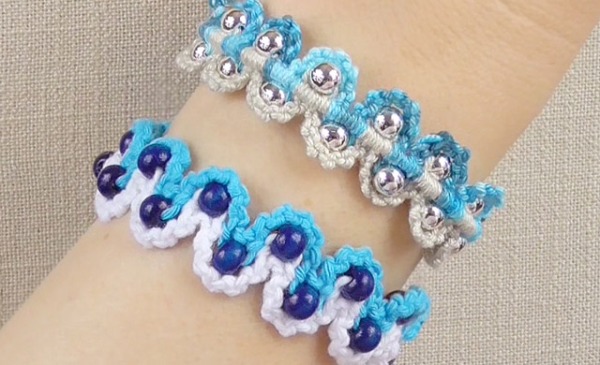
IDEA I LOVE
This afternoon, Mini Electric (my son) and I are going to see a local production of HAIR. It seemed only fitting to add a tad o’macrame to the tutes today. These bracelets are cute and easy to do — and I love that you can add color and your own taste in beading. Try it out and give one to your BFF. She’ll love it and you’ll feel so good about yourself. Watch the video for instructions!
DESSERT!
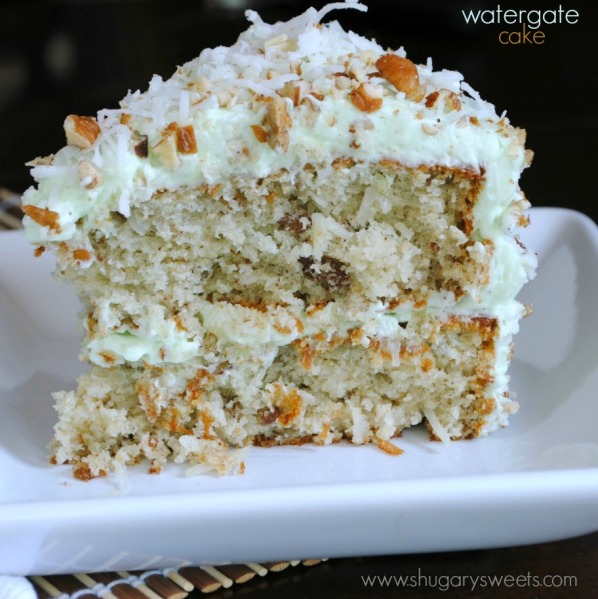
WATERGATE CAKE
Ingredients
- 1 box (18.25oz) white cake mix
- 1 cup oil
- 1 pkg (3oz) instant pistachio pudding
- 1 cup lemon lime soda
- 3 eggs
- 1/2 cup chopped pecans
- 1/2 cup sweetened, shredded coconut
- 2 (3oz) envelopes Dream Whip
- 1 1/2 cups milk
- 1 pkg (3oz) instant pistachio pudding
- 1/2 cup chopped pecans
- 1/2 cup sweetened, shredded coconut
Instructions
- In large mixer bowl at medium speed, add cake mix, oil, pudding, eggs, and soda. Fold in chopped pecans and coconut. Pour into greased & floured 9inch round baking pans and bake in a 350 degree oven for 35-40 minutes. Cool completely on wire rack.
- To frost, whip dream whip & milk until peaks. Gradually add the pudding & beat until light & fluffy, about two minutes. Spread on first layer of cake. Top with second cake layer and cover cake completely in frosting. Press pecans and coconut into cake and refrigerate two hours or more. Serve cold!
SOURCE: http://www.shugarysweets.com/2012/07/watergate-cake#_a5y_p=1434193
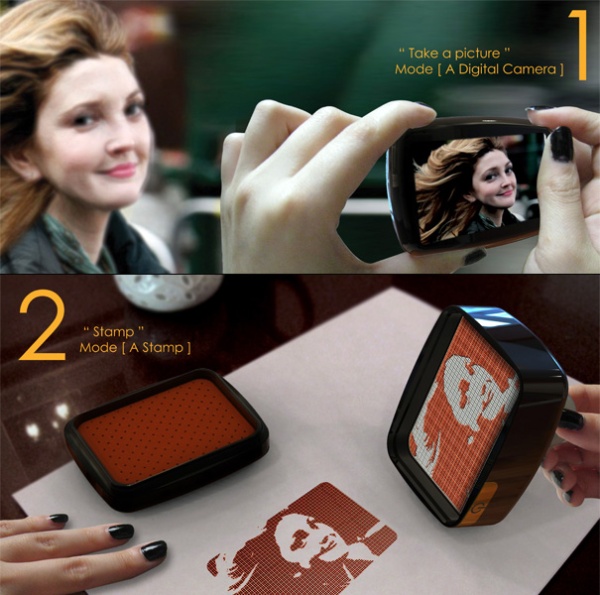
MUST HAVE
Dear God! Look at this! A digital camera that becomes a ‘rubber’ stamp? I will swear off cheesecake for life if I could get my hands on one of these!
http://www.yankodesign.com/2010/06/29/digital-picture-now-comes-stamped/
IDEA I LOVE
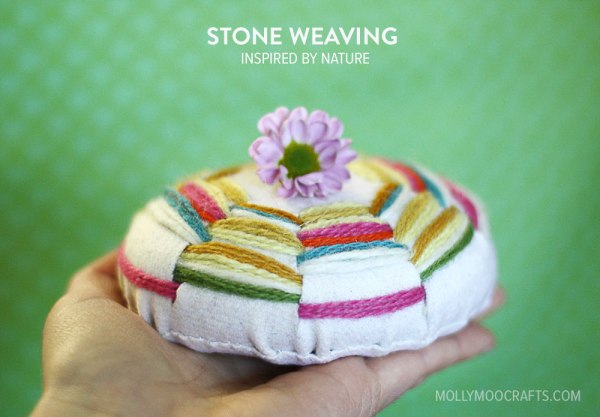
How cool is this? Find yourself a big rock, cover it in fabric, then weave fibers through your rock covering! Yeah, this could be a kids project but I think with a little creative mojo we could really “rock” this craft! Imagine adding embroidery or another kind of weaving through the woven yarns? Imagine adding texture or paint to the process? Wow! I just gave myself a head rush thinking about it all… Start here:
http://mollymoocrafts.com/stone-weaving-crafts/
SHOEspiration
 IDEA I LOVE
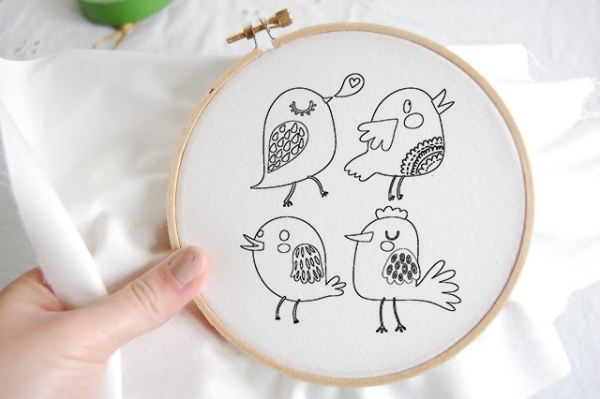
When you go to this link you will find for patterns to trace onto fabric, or run through your printer, so that you can hand embroider these cute little birds. Add some color, embroider on textured fabric, or just embellish a piece of clothing or fabric with these designs (or just one of the designs), and not only will you be very pleased with and proud of yourself, what you have embellished with floss will remind you of your creative days and creativity for years to come. Pick up your free designs here:
http://grafficalmuse.com/?p=1251
DON’T MISS A THING, MISS THING!

PLEASE SUBSCRIBE TO THIS BLOG so you don’t miss a thing!


Thanks so much for sharing my piggy purses! Loving your blog!
LikeLiked by 1 person
Loved Rockin Robin !!
LikeLike
Could not resist the optical illusion! Tripping on Sunday morning.
LikeLike
OMG! That Watergate Cake sounds so good! And thank you for saying what I’ve always thought… the computer can’t test how easy or difficult construction is, so please make your design! I also question why the pictures on patterns are often so ugly compared to the samples in a shop. Without the shop sample, there are many patterns that would not sell! All that said, I haven’t designed a thing, yet, so who am I to complain! LOL! Great new format, Mark!
LikeLike
Love your blog!
LikeLike
I so agree with you on quilt designers who don’t actually make the quilt. If they can’t be bothered, neither can I! LOL!!
LikeLike
Nothing happened for me with the optical illusion. What did I miss?
LikeLike
Amen to your rant! Computer programs are wonderful, but patterns always need to be tested. That’s especially true for needlework designs that rely on precise colors.
One of my works in progress is a cross stitch design where the designer took a painting (with permission) and converted it to cross stitch using a computer program. She got the computer mockup to look good, but she never actually stitched the design. The result is that a key part of the design, i.e. some amusing text, is illegible because the colors on the screen didn’t exactly match the colors of the embroidery floss. To make matters worse, when she published the design she didn’t even use the computer mockup on the cover of the pattern — she used a photo of the original painting! I’m never buying this designer’s patterns again.
LikeLike
There’s this “vintage” (published in 2000) quilt book, “Cups and Saucers” by Maaikke Bakker. I LOVE this book and have made multiple things from it.
LikeLike
Yes there is! I think that book is from around, what? 1999? I remember it (heck, I may HAVE a copy upstairs!) LOL xooxm
LikeLike
Thanks for posting my embroidery pattern 🙂 I was nosing around analytics today and found your blog, I love it! Take care! – Leslie@grafficalmuse.com
LikeLike